Homemade Bread Bowls
Homemade bread bowls are ideal for creamy soups, chili, or dips. Make these incredibly easy homemade bread bowls with this easy recipe.
Ingredients
INGREDIENTS FOR BREAD BOWL
- 3 ½ cups (450 g) Bread flour, spoon & leveled;
- 3 ½ cups (465 g) all-purpose flour, spoon & leveled; plus 1-2 tablespoon as needed
- 2 ½ cups (592 ml) lukewarm water [100 F – 110 F]
- 4 ½ teaspoon (14 g) Active Dry Yeast
- 1 tablespoon (12.5) g sugar
- 2 tablespoon olive oil
- 2 teaspoon salt
FOR EGG WASH
- 1 egg white + 1 tablespoon water
Instructions
DIRECTIONS FOR BREAD BOWL
STEP 1: PROOF YEAST
- In a cup, stir in lukewarm water [100*F – 110* F], sugar, and yeast. Let the mixture stand for 10 minutes, or until it turns frothy, and doubles in volume.Note: If the yeast is active, the mixture turns frothy, and doubles in volume. If the mixture does not double in size, start the process again with fresh yeast.
STEP 2: PREPARE THE DOUGH [BY HAND OR USING STAND MIXER]
- Into the bowl of a stand mixer, add bread flour, all-purpose flour, and salt. Mix the dry ingredients.
- To the flour, add olive oil and yeast mixture. Using a dough hook attachment, knead the dough for 5-7 minutes, or until the dough is soft and pliable (dough will start to leave the sides of the bowl and form into a smooth ball).Note: If you are kneading by hand, mix the dough with the back of a spatula until all the ingredients are just combined. Transfer the dough to a lightly floured work surface. Knead the dough until it is soft, pliable, springs back when pressed, and is not sticky around 8-10 minutes.
- OPTIONAL: If the dough feels too sticky, add some flour, one tablespoon at a time. If it is too dry, add 1-2 teaspoons of warm water, and knead the dough, until it is nice and soft.
STEP 3: FIRST PROOFING USING INSTANT POT
- Place the dough in the greased inner pot. Place the lid, and cover the pot. Turn ON YOGURT (normal) for 30 minutes. After 30 minutes, the dough will have risen and doubled in volume.I used a glass lid that fits, to cover the inner pot.Note: For the traditional proofing method - Shape the dough into a ball and place it in a greased bowl. Cover the bowl with a kitchen towel and place it in a warm place, for 60-90 minutes or until it doubles in volume.
STEP 4: SHAPE THE BREAD BOWL
- Lightly grease a ( 9 * 12 ) inch baking sheet.
- Transfer the dough onto a work surface and deflate it.
- Using a bench cutter, divide the dough into 6 equal pieces. Cover the pieces with a damp kitchen towel, while you work with a single piece.
- Take a piece of the dough ball, and roll it into a tight ball. Stretch and tuck the edges in the center. Turn the dough, seam side down, and roll it into a smooth ball.Note: This is an important step, roll the dough into a tight ball. If the ball is rolled loosely, it may lose its shape during baking.
- Place the ball, seam side down, onto a baking sheet. Cover with a damp kitchen towel while you shape the rest of the balls.
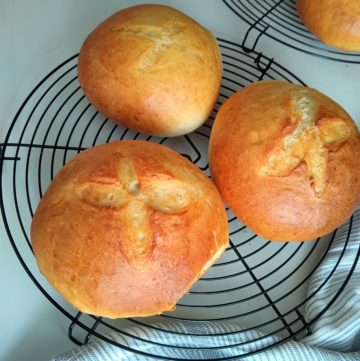
- Using a sharp knife, score an X into the tops of each dough ball.
- Cover the balls with a damp kitchen towel and place it in a warm place to rise again, around 30-45 minutes or until double in size.
STEP 5: BAKE BREAD BOWLS
- Towards the end of the second rise, place an empty broiler tray on the top shelf. Pre-heat the oven to 400 F.
- In a small bowl, combine egg white and water. Using a pastry brush, apply the egg wash on the balls.
- Place the baking sheet in the center of the oven. Pour 1 cup of hot water into the broiler tray.
- Bake for 25-30 minutes, or until deep golden brown. Remove from the oven, and transfer the bread bowls on a cooling rack. Cool completely.
- When you are ready to serve, cut the top ⅓ off each bowl, and scoop out the bread from the inside. Fill the bread bowl with some Corn Chowder or your favorite soup. Serve immediately.
Video
Notes
Please refer to the post for the following:
- Pro Tips For Best Homemade Bread Bowls
- Directions For Make Ahead Dough
- Directions To Freeze The Dough
- Directions For Freezing Bread Bowls
- Frequently Asked Questions
Disclaimer
Nutrition values are my best estimates. If you rely on them for your diet, use your preferred nutrition calculator.
Tried this recipe?Mention @livingsmartandhealthy or tag #livingsmartandhealthy
Follow Me On PinterestFollow @livingsmartandhealthy!